Wix or Squarespace? What You Need to Know! 2021 / 2022

We’re coming to the end of 2021 and about to enter 2022. It’s a great time to start putting together a new website for your business. But which website builder should you choose? You’ll have seen that there are lots of options to choose from. There are three big contenders in the space at the moment – WordPress, Wix and Squarespace.

WordPress – The Industry Giant

WordPress has been around for a long time now – about 18 years, it has matured a lot in that time. It is hugely popular, over ⅓ of websites use it! That’s for good reason too. It’s hugely flexible, with a wealth of plugins available that can add almost any functionality you can think of. There’s literally thousands of themes to get you started too. Sounds great, and it is, but it can be quite overwhelming if you haven’t used it before. By default, without any plugins, WordPress makes for a fantastic blogging experience and gives you the ability to put together some fairly simple but clean looking content pages too.

It is hugely popular, over ⅓ of websites use it!

However, as soon as you want to do anything more complicated, such as selling products, or using more complex and customisable pages, you’ve got to start working with plugins. Either that, or you can delve into the code and start adding features yourself. Plugins can vary from tiny little modifications that you barely even notice, to huge, complex page builders. There’s a corresponding variation of prices too though. Plugins can vary from free, to hundreds of £s.

Aside from having something custom built from scratch, WordPress is the next best thing. But the focus of today isn’t on WordPress so we’ll leave it there for now.

Join my list to see the latest news, hints and tips for building your own business websites. You’ll get sent the recording for my latest workshop absolutely FREE too!

Squarespace & Wix

Funnily enough, Squarespace is about the same age as WordPress – released in 2003. Wix is a little bit younger as it was released 3 years later. They’ve all had plenty of time to mature into the fantastic products they now are, to help you put an awesome website together. 

Squarespace and Wix, let’s start with their similarities. They are both there to serve the same purpose – to allow you to build your website with as little pain as possible but still have something that satisfies your needs, and gives you all the functionality you want. They both also host the website for you, and can handle your domain name too if you don’t want to do that yourself.

Both are aimed heavily at allowing you to focus on designing your website and writing your content, rather than fiddling about with plugins, code and all that stuff. However they tackle this problem very differently; they both have plugins, or ‘apps’, you can add to your site. These give you more capabilities which aren’t included by default. The plugins are often created by Wix or Squarespace themselves anyway, so you know they will work well. When made by a 3rd party, they’re still checked to make sure they’re safe and will do what they say they’ll do.

They both also let you add shops, blogs, contact forms and pretty much anything else you could reasonably want. To some extent, even their interfaces have quite a lot of similarities, at least at a glance; we’ll get more into that shortly. The big question is, “Do they produce good websites?”, and the answer to that is, “Yes! Yes they do!”. But… which should you choose? That’s a different question altogether, and the answer to that is, “it depends”… But really, you can’t go wrong choosing either of them.

The big question is, “Do they produce good websites?”, and the answer to that is, “Yes they do!”

Squarespace

Laying Out Content

Squarespace really wants you put together sites, with a ‘clean’, and ‘modern’ design. Page content is split into ‘sections’, which are essentially rows.

Within those sections you add ‘blocks’, which are chunks of content. For example if I want a paragraph of text, I’d add a ‘text’ block. You can drag these blocks around and put them next to, on top of, or overlapping each other. There’s a lot of flexibility on how you can align things within a section! However, in going for that clean aesthetic, you don’t have much more freedom than attaching blocks to each other. The flexibility to put things exactly where you want them, just isn’t there.

There’s an upside to this though – your content will look great and size properly to whichever device it’s being viewed on (which, trust me, can be a pain). And, this is done without you doing any extra work! Squarespace is able to handle all the repositioning and resizing for you, freeing up your time for showing off your stylish website.

Squarespace lets you snap content blocks together to make clean looking layouts.

Styling Content

One thing that’s really bugged me when working in Squarespace is that you cannot click directly on a block of text to style it. Squarespace has set styles of text for your whole site; so you set styles for each size of heading, each paragraph, etc. When you want to change any of these, you have to open up a separate menu to edit them, it’s just a bit cumbersome to use really. However, once you’ve set these styles up, if you change one, everything else with that style will change to match it.

Commerce and Blogging

Setting up your shop on Squarespace, is easier than setting it up on any other platform. When you click the button to add ecommerce to your site, it takes you through the steps one at a time to add products, setup payment methods, delivery options, everything you really need. It will even let you import products from an existing shop like Etsy or Shopify, without you having to input them all yourself.

Blogs are even more straightforward. Once you’ve written and published your first blog post, you can add the “Blog” button to your site’s menu. And that’s it! Of course, there’s a lot more customisation you can do to your shop and blog but it’s that simple to get them up and running to start with.

Advanced Editing

As someone who is used to building websites from scratch and laying them out with code, I really like to dig in and tweak things manually, to get them exactly how I want them. Depending on your subscription tier of Squarespace, you get different levels of code editing capabilities. The highest tier allows you to edit the code for absolutely everything on your site. At the most basic level, Squarespace lets you build blocks with your own code in. So in a way it lets you bypass the strict positioning options of blocks as you can build your own and place them wherever you like.

It’ll also let you set your own text styles per block if you want to do that, but of course it comes with the caveat that it’s more complicated to edit than just using dropdowns, sliders and buttons.

Squarespace Overall

If you want building your website to be as simple as possible, Squarespace will pretty much hold your hand the whole way through. If you don’t have an eye for design, or you just don’t have the time or will for the complex side of web-development, you’ll have a great time with Squarespace. It lets you focus on putting your content together over anything else. If content is what you want to focus on, it’s probably the choice for you!

Wix

Laying Out Content

At first glance, Wix appears to be very similar to Squarespace in layout. You’ve got your main controls on the left of the editor, for pages, design etc. It’s where you’ll find most of the things you’ll need! 

Squarespace (Left) and Wix (Right) editor interfaces.

If you enjoy design, you’ll like Wix. Unlike Squarespace, it allows you to place elements anywhere you want to on a page. It has grid lines you can use to align things to. But elements don’t ‘snap’ to the grid lines in the way they do in Squarespace. It’s a very versatile system. However, if you want a more Squarespace-esque experience, There is a plethora of pre-designed “strips” available for you to use. These are Wix’s equivalent to Squarespace’s “sections”.

Styling Content

Just like page layout, styling in Wix also has a lot of similarities to Squarespace. You can set text styles for your entire site and reuse them wherever you want, to keep things consistent. But unlike Squarespace, you can set styles individually for text elements if you want to. You can also just double-click on a block of text and change the styling directly.

In Wix, you can change fonts for any text content, anywhere you want to.

Commerce and Blogging

Wix makes it very easy to set up your shop and blog. When you go into the page manager and click to add a shop or blog page for the first time, it’ll walk you through the steps you need to follow to get them working. If you add a shop page it’ll take you through adding your first product and setting up payment methods. It’s a similar experience to Squarespace, and I think that’s a good thing in this case! They both provide a fantastic experience for getting your shop or blog running on your website.

Of course there is a lot more you can do with the configuration of your shop or blog on either platform, but to get something going, it’s very straightforward.

Advanced Editing

This, I think, is where Wix really falls short of most other website building tools, including Squarespace and WordPress. If you want to edit the code of a website you’ve built in Wix, you’re going to be stuck, it’s not something that you can really do. Wix does let you add custom code to certain parts of your website, but it’s only adding code, you can’t edit anything that’s already there.

The appeal of these tools is that they’re nice and quick and you know what you’re getting, but because you’re not making it from scratch it’s not going to be very personal. With this in mind, if Wix or Squarespace is right for you, you probably don’t mind the absence of custom code-ability too much. If you want to build more custom sites, you may want to go with WordPress or even writing something from scratch.

Wix have recently introduced a new platform called “Velo” that allows you to build web sites and web apps using standard programming languages using their custom editing system. I’m quite excited to have a look through it myself, but it doesn’t seem quite as beginner friendly as Wix’s standard page builder, or even WordPress as it’s very code heavy and so not necessarily for the same audience.

Wix Overall

If you enjoy working on your website’s design as well as its content, Wix provides you with an editor that you can quickly get to grips with and enjoy using to build-out your whole site. But if you want to focus a little less on design, or you’re less confident with it, then Squarespace may be the better choice for you, with it’s heavy focus on placing content in blocks that slot neatly together.

For extra website features like social media integration, contact forms, and most other things you can think of, both Wix and Squarespace have extensive libraries of plugins / extensions that you can look through. In those you’ll find pretty much everything you could want and a fair few things you never expected too.

You won’t go wrong choosing either of these platforms. They are both good at different things, and for different people. But you can be sure that you’ll end up with a really good website at the end.

But what if you want something more?

WordPress, Wix and Squarespace represent the range of tools available to make the website building process easy for you. If you want something more specialised however, there isn’t much choice available. As I mentioned earlier, WordPress can do almost anything you want. Unfortunately, it does still have some limitations. If you want something complex with special functionality, even WordPress can show its limitations. At that point, commissioning a website developer to build something custom for you, is often the best route to go. If you’re interested in that send me a message, and we can have a chat.

If you found this post helpful then let me know by commenting, and share the word with your social media community (feel free to tag me @danfernitwizard). You can also get in touch through the contact page for any extra help!

“Upgrading” to a Slower Laptop, Definitely Turned Out To Be a Downgrade

You may remember I wrote a post barely 6 months ago discussing how I no longer had a need for a powerful desktop and that having a moderately powerful laptop was all I needed. Well, after only 6 months I’ve caved, and realised that isn’t actually the case, and built myself a shiny new desktop machine.

What went wrong?

There’s a number of reasons that relying solely on laptops isn’t ideal for me. Aside from the obvious ones which we’ll come back to shortly, there’s the size; but that’s not in a way you’d expect. In essence, when I’m looking at big blocks of text, or have lots of things going on, on screen. I just can’t read anything. That’s no fault of the laptop instead, more of a fault of a genetic condition of mine – nystagmus. The small screen isn’t so much an issue when playing most games, watching videos, and doing day to day things like Microsoft Office, and web browsing. It’s when we come to busy things like coding using an IDE, and using more complex productivity applications like the Adobe Creative Cloud suite, Unity and Blender, that I start to have any real issues. There’s just too many things on screen at a time, so there’s not much space that can be taken up by each of them.

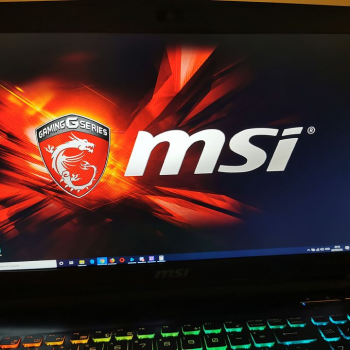
I’ve found myself regularly plugging into an external monitor or two, and using the machine more like a desktop more often than I expected. I never did it I the first few months of owning the laptop, but with the projects I’ve been working on so far this year, I’ve felt the need for it most of the time. Even just dropping down to having 1 display instead of 2 has had more of an impact than I ever expected – and I expected it to be huge. However, I’ve surprised myself with how much I’ve managed to do on the MSI’s 15.6” 1080p display. Don’t get me wrong, it’s a great display. It just isn’t suitable for me.

The more ‘normal’ issues I encountered

As I just briefly mentioned, only using a single display instead of 2 is a huge change, and not a good one. A couple of years ago I was rocking 3 monitors with my main desktop and I changed down to 2 when I moved to University. That wasn’t a huge change, and I managed it pretty well, adapting pretty quickly, but I just can’t get used to having one display on a main machine. Even when not trying to get work done, it’s just nice being able to have my music library open on one display, and whatever I’m doing on the other. If you’ve never tried it, I’d highly recommend it. If you have a desktop that is.

As much as I said in my post about moving to the laptop that the drop in CPU and Graphics performance wasn’t noticeable. I can tell you now, that after months of actually using it day to day, not just on a honeymoon period, the difference is huge, and noticeable. I upgraded to the 1TB NVMe SSD I mentioned pretty quickly after writing the last post, as the 128GB SATA drive preinstalled got filled very quickly and felt super slow compared to my old 960 Evo 250GB that was in my desktop.

The drop in CPU performance wasn’t noticeable at all in day to day tasks, as I’d expected. But, as soon as I started to edit video, or even just do some moderately complex composition in Photoshop, the difference became apparent very quickly.

As for the graphical performance. I didn’t try to game much at all in the first few months I had with the laptop. I played a little bit of World Of Warcraft and it handled that just fine. Given the weird demands of that game, you’d like to think it’d have ran well, but it very definitely could have not. Luckily, it did. Every other game I ran on it did pretty well too. I did have to drop the graphics settings down quite a bit on everything I tried though, when compared to the settings I was using on my old GTX 1080. But, I got everything running at 1080p at 60 FPS, which is all I could have hoped for.

“VR gaming was a completely different story all together. I can give a very quick synopsis – it wasn’t good at all. I didn’t try a huge number of things, but with what I did try running so badly, I didn’t want to try much else. I’ve never found myself getting motion sick whilst playing VR before, but with the weird frame rate drops, and tracking glitches, it happened whilst running the Oculus Rift from the laptop. I think the frame rate drops are likely due to to the GPU not being quite up to the task, especially with only 3GB of VRAM. And the tracking glitches were likely due to the CPU thermal throttling, causing it not being able to keep up with the tracking data from the sensors.

What was I looking for in a replacement?

For starters I need lots more power, both in the CPU and GPU department. Ideally, I’d like it to be more powerful than my old Ryzen 1800X and GTX 1080 combo if I can fit that into my budget. I only had a 250GB NVMe SSD in that old desktop too. Since using the 1TB SSD in the ‘new’ laptop, I think I’d like to have at least that much NVMe based storage, along with a decent amount of mechanical storage too.

Choosing the CPU and Platform

It’s been three years since AMD launched the first generation Ryzen CPUs, and that includes the 1800X from my old desktop. I never had any issues with the old system, and so I expect the newer generation Ryzen platforms to be even more stable than that. However, at the same time, the last Intel system I ran – the Core i7 4790k with a GTX 970 was super stable too, apart from the two times I had to RMA the GTX 970, but that was due to manufacturing issues on Gigabyte’s part – nothing to do with NVidia’s chip. So, choosing between Intel and AMD will be down mainly to price and performance.

The Ryzen 3000 series is giving Intel a run for it’s money at every single price point, all the way from the 6 core Ryzen 3600 at around £150, to the Threadripper 3990WX 64-Core chip at about £3500. AMD is also consuming less power, and otutputting less heat compared to the Intel counterparts, and at a lower cost, and often higher performance. It seems like a no brainer to go with AMD this time round, as Intel only seems worthwhile if I was after a feature that’s exclusive to their chips – such as Thunderbolt, or Optane memory; or if I wanted to build another hackintosh. None of these are relevant to me as I want a powerful Windows desktop. The plan was basically to go with the best Ryzen 3000 chip I could afford.

Along with choosing the CPU, there’s the choice of motherboard. With a lower end chip like the 3600 or 3700, it’s reasonable to choose a last generation motherboard like a B450, or an X470. But, with the higher end Ryzen 9 chips – the 3900X and 3950X, it’s worth springing for the new X570 chipset. For your average Joe that just wants a fast gaming machine, it won’t make much of a difference, but neither will a 12 or 16 core CPU, but if you want lots of expansion, including very fast, NVMe based storage, having PCI express 4.0 as standard going with X570 just makes sense. I want to be able to have lots of very fast PCIe 4.0 storage. I’m not going to yet, but definitely in the future, so X570 is my platform of choice.

To choose a CPU for X570, for me it’s simple, get the fastest chip that fits into my budget, and at RRP (recommended retail price), that would be the Ryzen 7 3800X, which goes for around £350. However, when I was purchasing the components, there was a sale on for the Ryzen 9 3900X, making it £400. For the extra four cores, and eight threads it’s a no brainer since I could still afford it.

Selecting a GPU

In early 2020, thi is probably the hardest component to choose as there’s so many options available, as well as the fact that there’s supposedly a plethora of new cards coming from both AMD and NVidia in the coming months. However, due to the current situation witht COVID-19, if these new cards do get launched, which is likely to be delayed, actually getting ahold of one will be much easier said than done. As well as that, the performance increase we’re likely to get won’t be massive. That’s something I’m happy to go without. The most I wanted to spend on the graphics is around £500. This puts me a chunk off the price of an RTX 2080, but well within the price range for a lower cost RTX 2070 SUPER, or a higher end RTX 2070. If I wanted to spare some extra cash, the RX 5700 XT is a solid option sitting around £400 and between the RTX 2060 SUPER and RTX 2070. I want the fastest card I can, so I chose a 2070 SUPER; more specifically the Gigabyte Windforce 3X variant.

The Rest of the Components

Choosing everything else was straightforward. An 80 plus Gold rated power supply of the Corsair TXM variant was a clear choice for a power supply. 32GB of 3200MHz DDR4 will be plenty for now, with an easy path to 64GB should I need it in the future. I want the system to look good too, so I chose the Corsair iCUE 465X RGB case. I’ve had lots of Corsair stuff in the past so that case was a clear choice at the price point I was looking. I went with two 2TB hard drives over a single 4TB drive, as it would allow me to keep a local copy of some data should I need to. NVMe storage was a little more difficult as there’s a range of speeds to choose from, and all at different capacities and price points. For now, having a PCIe 4.0 SSD seems to expensive with the amount of space I’d get, and having 5 GB/s over 3 GB/s probably won’t be that noticable in most tasks these days. With the PCIe 3.0 models, there’s still various speed choices. The lower cost models tend to be between 1 and 2 gigabytes per second. Whilst higher end models are around the 3 gigabyte per second mark. In the end I decided to go with a 480GB Corsair MP510 as my boot drive, which reads and writes at around 3 GB/s, and a 1TB Sabrent model as my secondary SSD. Both of these cost about the same, with the Sabrent being slower at around 2 GB/s. For my main games, apps and in progress projects, the 1TB drive should be perfect.

What it’s Like to Actually Use?

It’s really, really fast. I’m surprised at how much faster it is than the 1800X from my last desktop.  The 2070 SUPER is even noticably faster than the 1080, especially in VR with more demanding titles like Doom VFR. This is just when using it generally. When benchmarking, the 3900X doubled the Cinebench R20 and R15 scores the 1800X achieved. Given that it’s only got 50% more cores, a 100% performance increase just shows how impressive the IPC improvement of Zen 2 is. When running the same tests on the 7700HQ in my laptop, I’m looking at over four times the performance, that’s just incredible. I also ran 3D mark Time Spy, as Port Royal wasn’t compatible with the GTX 1080 so I have no results from that. I’m not going to go into specific numbers, but the new system, beat the old one by a not insignificant amount. Likely due to the increased performance in the physics, and combined tests. According to other people’s benchmarks the 2070S should be around 10-15% faster than the GTX 1080, and this seems to hold true when comparing to my old benchmark results.

How did COVID-19 Affect the Purchasing Experience?

With the arrival of COVID-19, or the novel coronavirus, the supply chain, especially on China’s side for new hardware, is being affected somewhat significantly. Because of this, price rises and component shortages are highly likely to happen, and I have seen them starting on various models of things. Because of some new projects I’ve been working on, having a more powerful PC was necessary. I ordered the parts sooner than I had planned because of the likely issues happening soon. Fortunately, at the time of ordering my components there was a discount on the CPU, as I mentioned earlier it allowed me to go with the 12 core 3900X over the 8 core 3800X. I also managed to save a bit on the 2070 SUPER too, at £50 off. A pretty decent saving really.

Overall, was it Worth the Reupgrade?

If we look at it purely for work purposes, yes it really was. For video projects I can export in less than a quarter of the time. For design and modelling, I can work much faster and more smoothly. And for development I can compile much faster. Less time waiting means more time working, which means there’s more money to be made. Aside from that, I can spend less time working, and get the same amount done. It’s a win in every regard really. For non-work purposes, the experience just doesn’t compare. The desktop just beats the laptop handsdown, games just run so much better, and the general usability, and responsiveness is much better too.

Don’t Buy A New PC Just Yet… Try These First

Why Would you Want to Do Any of This?

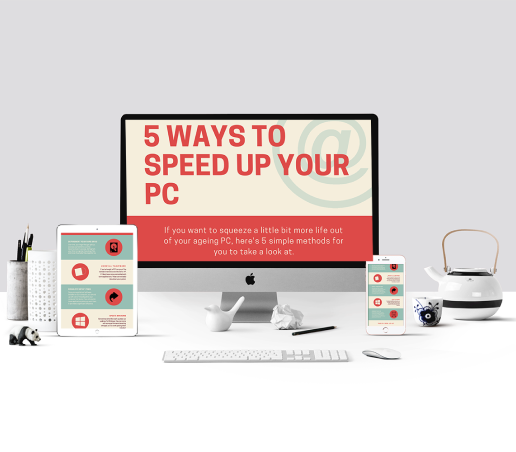
Buying a new PC is an expensive and often stressful ordeal, that you ideally want to avoid. If you want to play the latest game at max settings, these tips aren’t for you. But, if you just want the overall snappiness of your PC to improve, these are for you. They’re all FREE to do, apart from the last, which still isn’t expensive at all. So let’s jump into it.

1 – Defragment Your Hard drive

Like a CD, DVD, or Blu-Ray a hard drive is a disk of sorts, that spins round really fast. However, the difference being that they’re read and written to by a magnet, instead of a laser. The magnet which works with the data is on an arm which moves backwards and forwards across the disk as it’s spinning. In an ideal world, if you’re trying to load a big file from your hard drive, the file would all be in one big long chunk, rather than being split up across the disk. This means the magnet doesn’t have to move around much when reading the file, making it faster.

Unfortunately, as a disk becomes full with various sizes of files, the data becomes “fragmented”, where files become spread out across the disk, in multiple fragments. This means the data cannot be read in consecutive rotations, which results in files taking longer to load. This will be most noticable to you when you’re loading applications and opening files.

Quite predictably, the process of reversing the fragmentation, is called defragmentation.. If you’re using a Mac, you don’t need to worry at all about defragmenting, as your Mac automatically does it. That’s assuming you’re Mac is running software built after 2002. On Windows however, it’s a bit different as you have to do it manually. It’s still pretty easy to do though. Just search in the start menu for defragment, and it’ll give you the “Optomise Drives” app.

2 – Uninstall “Bloatware”

If your PC came from a typical manufacturer like HP Dell, Lenovo, and others, there will no doubt have been some software installed by them when you got it. A lot of this software isn’t necessary for your computer to function and is often just fairly useless utilities which run in the background, hogging system resources. It’s been known for these utilities to sometimes send your private data back to the manufacturer without your knowledge. Typically, the only usseful software that’ll be preinstalled is drivers, which tell Windows how to communicate with other parts of your computer, like the sound or Wi-Fi. Apps for system recovery are probably worth keeping around too, as they may prove useful. If you’ve got a gaming laptop for example, you may have some software for configuring lighting, or adjusting performance. It’s worth keeping these apps installed too.

These types of useless applications are known collectively as “Bloatware”. Before removing any such applications that were preinstalled, I’d recommend taking a backup of your system. This is just in case something goes wrong, although it’s not likely. Even Microsoft themselves install bloatware with Windows that you don’t need. Just right click these apps in thr start menu and click uninstall to get rid of them.

Removing these apps will help your PC to boot up faster, as there’ll be less going on when you login. You’ll also regain a bit of lost storage space, and a general improvement in the usability of your PC.

3 – Disable Startup Items

When you login to your PC, it can often take a considerable amount of time before you can actually do anything on it. This is most likely due to programs which start up as soon as you login. You’ll likely find that most of them are programs which you never use, or use so rarely, there’s no point in having it start on login. Windows 10 has made it easier than ever to modify the list of startup items, and enable and disable items as needed.

The best thing to do to speed things up in this regard, is to go through each app, find out what it is – usually by looking it up on google, then decide if you want it to start on login or not. The only things that are absolutely necessary to start at login are: apps relating to drivers, and anti-virus. Anything else I’d say is entirely optional.

To see the list of apps, simly right click on the Windows taskbar and select “Task Manager”, click “more details” if you can’t see everything, and select the “Start-up” tab. Here, you can see everything that can possibly start at login. These can be right clicked and enabled or disabled as you wish.

4 – Update Windows

Windows updates, especially since the release of Windows 10 have been getting a bad rep for causing lots of issues for users. These being that they decide to install at the least convienient times, and that they have been known to render entire installations broken. Over the last year or so, ironically through the process of updates, Microsoft have improved the process significantly.

It’s very important to keep your Windows installation up to date. As well as having the latest features from Microsoft, you’ll also get significant improvements in security, as any bugs which can be bad for security will be patched pretty quickly. New featues might sound like something that may be detremental to performance as more things are being added, but it can actually be the opposite as new features could be optomisations in Windows itself which can help to speed things up.

One feature that’s been added fairly recently is the ability to uninstall some of the stock Windows 10 apps which can both free up space for you, and have less things running in the background.

5 – Upgrade to an SSD

So what is an SSD? Whilst a hard drive is a spinning disc, much like a CD, an SSD has no moving parts at all. This change has multiple advantages; not least of which being the speed improvements, and reliability improvements. For the most basic of SSDs, you’d be looking at a speed increase of at least 300%. On the higher end, this increases to a 3000% increase. This results in your PC booting up REALLY fast, and opening applications REALLY fast.

No matter what you use your PC for, you’ll without a doubt notice a huge performance change when switching to an SSD. Having one is basically a no brainer. I’ll have an article out soon detailing the actual upgrade process itself.

Bonus Tip – Disable Animations

There’s a lot of little animations within Windows, which are designed to make the experience feel much more slick. For example, the app tiles within the Windows Start Menu. If your computer struggles with its graphics performance, these animations can make the experience so awful it could be considered unusable. If you’re finding you are having such issues, it’s worth turning them off. To do so, open the start menu and type “sysdm.cpl” and hit enter. Head to the advanced tab and click the “Settings” button on the performance section. Then press the “adjust for best performance” button, and click “OK”.

So, to close, I hope that these tips have been of use to you, and that you’ll have successfully sped up your PC in one way or another. Please consider subscribing to the mailing list to get notified of everything that’s coming up on the horizon.

Diving in at the Deep End

The beginnings of my experiences working on a unique, and disorganised network.

Today is the second day in December, making it almost fou months since I started working as Ushaw College’s one man IT team. Over that time, it’s been a worthwhile learning experience, working on many different things. I think I’ve accomplished a lot, and everyone who I’ve worked with has been pleased with what I’ve been doing. I’m quite pleased with myself, given it’s my first substantial job of the sort.  Most of my work has been done in Ushaw’s server room, working with the network hardware. Either that, or I’ve been in my own office building PCs or configuring things.

Ushaw hadn’t had a dedicated IT person for quite a few years. The IT work being done was mostly by the commercial manager. With that ‘IT team’, things were running fairly smoothly, but unfortunately, if things went wrong, they weren’t getting fixed quickly. The equipment also wasn’t being kept organised, so it was very difficult to work on any of the equipment.

The Existing Setup

Sine the last dedicated IT manager had left, Ushaw has gone through some significant changes in what it does, and how it’s ran. Pretty much all the servers had been decomissioned, and a new, much smaller phone system has been installed. At the beginning of this year, Ushaw got a massive internet connection upgrade – a dedicated fiber line. Unfortunately, it’s only a 100 megabit connection, on a 100 megabit carrier but it’s super quick for what it’s being used for. And what it’s being used for really isn’t a whole lot.

The network at Ushaw is intended to provide a connection to 4 main groups of people – Ushaw’s staff, Ushaw’s studio holders, B&B guests, and those using Ushaw’s facilitied to hold meetings etc. All of these groups of people ideally need their network activities completely seperated from one another, to avoid any security issues.

When I arrived at Ushaw, there was no such security measures in pleace. All of the groups of people could interact with each other, with no regards to privacy and security whatsoever. As well as the security issues, there was also some issues with the reliability of the connection, whereby it would keep dropping out, and running much slower than it should be.

New Equipment

Some of the network equipment needed to be changed. The new equipment would solve the dropouts, and the security flaws. Ubiquiti’s UniFi line was my choice of new equipment. It gives the commercial manager the ability to manage the network easily. It’ll also let us quickly expand the network. Since Ushaw college has been around for over 200 years, some areas aren’t quite ready for 21st century technology yet. Just last month, Ushaw’s old infirmary building was reopened as an education and music space. The new network has been expanded to there with more UniFi equipment.

Aside from choosing UniFi as our new network platform, choosing the equipment from the line was easy. There’s only one suitable router from Ubiquiti’s line up. That’s the USG-PRO-4. I’ve got that plugged into the incoming fibre connection. Since its install, it’s been rock solid, and hasn’t failed us once. In the old setup, there was a 24 port switch after the router which was getting pretty full, so that’s been swapped out for a UniFi 48 port switch. Using the UniFi controller, I can seperate the network off for each group that needs access to it, which provides the necessary security features.

For my own servers, I was just using my own pfSense router, but now I’ve just made another VLAN and subnet on the UniFi network for our own equipment. This has made it much easier for things like port forwarding, which is very useful as Ushaw has its own static IP address.

The Upgrade Process

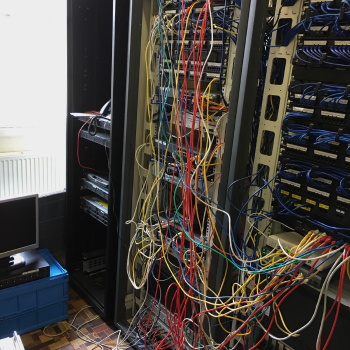
Since I had to manage this network, I needed to actually understand how it’s set up. The difficult thing in this case, is that there was very little documentation available to me. This meant, I had to spend a lot of time following cables, and connecting to IP addresses to work out how it was all connected together. You can see a picture of the old setup here:

As you can see it was quite a mess. There was a total of 5 switches in the Ushaw section alone. In the new configuration there’s only two. Four of the switches have been replaces with just one. The remaining old switch is a PoE model which is being used for any new access points we install. When that gets full, we’ll be replacing it with a UniFi 16 or 24 Port PoE alternative.

As well as just replacing equipment, I’ve had to tidy up the cabling, which will make it much, much easier to manage in the future. If there’s cables going in front of another piece of equipment, that then can’t be removed easily. In an ideal situation, you dont want any cabling going in front of a device it’s not connected to. In this case, I managed to to that with the new equipment. I used some extra cable management panels we had to keep it tidy. Now it’s pretty easy to remove any of the devices. Tracing cables is more difficult now, but with the right test equipment, it doesn’t slow things down at all.

Despite having a new VOIP phone system installed at the same time as the fiber internet connection, the old phone system was still in place. So after removing that, the equipment racks have become much more organised.

The Improvement

The difference between how the cabling looked before, and how it looks now is huge. it’s now actually possible to access the equipment in the racks. Since I took this photo I’ve improved it even more by swapping out some of the cabling at the bottom. Changing the cables to be more consistent with their colouring has made a huge difference to how it looks.

The leftmost rack is where most of the server equipment was being kept. There was one server just sitting on the floor behind the racks, and another in the middle rack. Now everything is in the leftmost rack. You’ll notice that there are now quite a few more servers there, compared to before. That’s because my own servers are now located in here, as it’s much better for their noise, and the cabling, given that they’re not in a proper rack. Before they were just stacked on the floor.

I’m currently in the process of writing about my personal interest in woking with servers. In my first year at university I bought two, and kept them under my bed. You can read more about that bizarre interest of mine very soon in another post. However, it’s probably going to get quite nerdy, long, and probably confusing.

Aside from Working with Network Equipment

Having only been working on the IT systems for four months, I’ve already made quite an impact on everyone who uses the systems, as their speed and reliability is now much improved.

As well as working on the network equipment, I’ve been working with the staff of Ushaw to keep things running smoothly. As you’d expect, this kind of IT support has resulted in me fixing printers, basic connection issues, and things like that. They aren’t the most exciting things to work on, but the fixes are almost always something quick.

There’s two main networks being run on Ushaw’s infrastructure – a university network, and the Ushaw network. The Ushaw network is the one I’ve been working on. Many of the desktops being used in Ushaw have been provided by the university and thus, are on the University’s network. Ushaw now want to move most of their staff over to Ushaw owned systems. To reduce costs, and increase support speed, I’ve been supplying, and building the systems myself. It means that the systems will be able to have the exact specifications we need, and be as fast as they can be.

So far, I’ve provided 4 systems. The staff who have been using them have been very happy, likely due to the fact I’ve built them as SSD only systems. In fact, oneof the staff who is still running on a university system is jealous of the new systems, due to their speed.

Ushaw plan to continue to expand their fleet of machines, including upgrades to the servers which host a variety of services for them.

Where Will Ushaw Take Me Next?

Ushaw is of course, just a client of mine. I still carry work for other people. There is a plethora of projects which I have planned for Ushaw in the future, this includes expanding the network to other areas of the building, and a migration of their cloud services from G Suite to Office.

However, I’m definitely pleased that I’m working with Ushaw, as it is giving me some valuable experience which will almost definitely be useful in the future, as well as just being a known client who can recommend me to others.

One Way to Stay Safe Online in 2020

It’s been ten and a half years since Microsoft released Windows 7 – their most popular computer operating system of recent years.

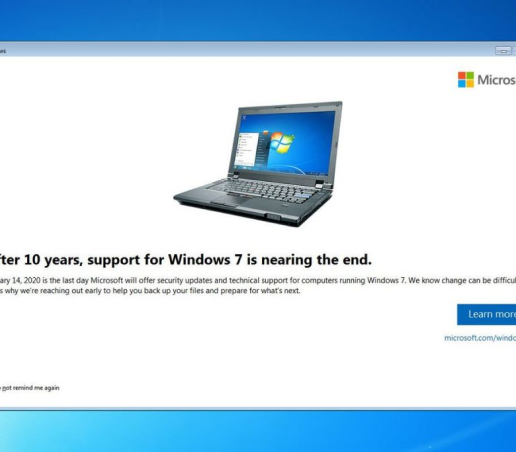
On January 14th of this year, Microsoft pulled the plug on the extended support service for Windows 7. It still remains on a whopping 32.7% of all computers, according to NetMarketShare. Given that it’s a 10 1/2 year old system, it’s impressive how well it’s held up. Unfortunately, due to the lack of support, that’s 32.7% of computers which are now vulnerable to security flaws which remain. Had the support still been in place, any found issues would be patched pretty quickly.

I think you know what I’m going to say here to help you stay safe online. That’s simply, just don’t use Windows 7. Upgrade your PC to Windows 10, or even 8.1 if you want to for whatever reason. Many of the 32.7% of users chose to stick to 7 due to some significant changes Microsoft made to Windows. Many also just won’t have thought to upgrade, or didn’t know they even could. When Windows 10 was released, it gained a bad rep for being buggy and having Microsoft do some shady things with your user data. The stability, bugginess and compatibility of the OS has now been much improved, and the vast majority of users have no issues at all.

There are of course people who still have issues with Windows 10. However, they often have specialised hardware or use an obscure piece of software, which have been designed around Windows 7. In these situations, a virtual instance of Windows 7 can be used to allow access to the hardware or software.

What Can Happen If I Don’t Upgrade?

Well, nobody can say for sure exactly what’s going to happen to your PC. However, we can say that you will be vulnerable to any security flaws which are found in Windows in the future, as they aren’t going to be fixed by Microsoft. Regardless of how careful you try to be onlline, there’s always a chance that something will infect your PC. Using anti-malware software will of course, help to keep infections and other bad things off your PC; but these won’t fix security vulnerabilities in Windows. It’s possible that infections would be able to hide from anti-malware and exploit these vulnerabilities. Of course, it’s very very difficult to make your computer entirely secure, even with the best protection software, and very careful use of the internet.

Interestingly, the big security risk isn’t with users’ individual PCs. It’s when a huge number of PCs get infected, and become what’s known as a botnet. A botnet is essentially a large number of computers which have been infected by a piece of malware which can then be co-ordinated by one person to attack websites to take them down, steal data, and other such malicious activities. This is, in some ways much more dangerous than individual cases of infection, as widespread damage can be caused.

How Difficult Is The Upgrade, and How Much Is It Going To Cost Me?

The upgrade process itself is straightforward. It’s just the case of downloading the installer and clicking next, next, etc. As long as you have a backup of your data, there’s nothing to worry about. In all likelihood, the upgrade will go smoothly and everything will be right where you left it afterwards. Windows 10 has even gotten pretty good at getting the drivers for your devices itself too.

According to microsoft you have to buy a license for Windows 10 directly from them. This will run you £120 for home, or £220 for the Pro version. There are however, places where you can find it much cheaper than that – Amazon is one such place. There are others, but their legality is questionable so I won’t discuss them here.

Aside from paying for it, it is still possible to get the upgrade for free, just like Microsoft was offering between 2015 and 2016. This may or may not work for you, and I’m not sure how legal it is, so I won’t say anything else on the matter. I will however, send you over to an article about it if you’re interested here.

That’s about all there is to say on the matter really. I hope you’ve managed to gleam some useful information which will keep you safer as the internet is a scary, scary place.

“Upgrading” From a Desktop to a Slower Laptop

My AMD Ryzen desktop has found a new home.

Shortly after the release of the AMD Ryzen platform in early 2017 I took the plunge and upgraded to the flagship Ryzen 7 1800X processor. I got a pretty decent board too – an MSI X370 Gaming Pro Carbon. It was my first system to use DDR4, and a huge multithreaded performance upgrade over my older Core i7 4790k from 2014. Single core performance wasn’t a big jump, but it was something. To go along with my shiny new GTX 1080, I had an awesome system, and it suited me well with what I was doing at the time. Despite many other people having various teething issues with Ryzen, especially with memory compatibility, I never experienced any problems at all. I’m guessing I was just lucky. The system got me through most of my degree and was a total workhorse – it did a lot for me.

Since the latter half of my final year at university, the system has mostly been sat dormant in our home office. I haven’t been gaming anywhere near as much as I used to. Any gaming I have been doing has mostly been on the Switch or Xbox One. It seemed like a bit of a waste keeping the system sitting around. Used market prices of 1st generation Ryzen and 10 series cards aren’t particularly high anymore. Because of this, selling the system just didn’t seem worth it. I still need a fairly powerful Windows machine around, as I still wanted the ability to play games when I wanted to.

The ‘new’ machine

I spend a little bit of time most mornings browsing around Facebook’s marketplace looking for anything that might be interesting. One such interesting item I came accross was an MSI gaming laptop with these specs:

  • Intetl Core i7 7700HQ Quad Core CPU
  • NVIdia GeForce GTX 1060 3GB GPU
  • 16GB (2x8GB) DDR4 Memory
  • 128GB SATA m.2 SSD
  • 1TB SATA Hard Drive
  • DVD-RW Drive
  • 1080p 60Hz IPS Display

Given its 7700HQ, it’s of a similar age to my Ryzen desktop – early 2017. Despite it being a similar age, it’s quite a bit slower, with half the CPU cores, and almost half the graphics performance.

If we consider the monitors I was using with the GTX 1080 on the desktop however, the huge drop in performance seems completely reasonable when moving to the laptop. I was either gaming with a 60Hz 4k display, or a 144Hz 1080p display. In theory, those resolutions and frame rates need at least double the graphical performance. Since the display in the laptop is just 1080p 60Hz, I should still be able to achieve the display’s resolution and refresh rate with ease.

The drop in CPU performance is where I’ll really notice a difference. From running virtual machines, to editing video, it’s just going to be slower. But, I’ve got my desktop hackintosh or MacBook Pro with Final Cut Pro X if I want a good, optomised editing experience which works well on a slower CPU.

Upgrading the laptop

With it being a gaming laptop, making it super thin wasn’t MSI’s priority, meaning it’s quite upgradable. The CPU and GPU are unfortunately soldered in, but they won’t need to be replaced. The RAM is just a pair of standard DDR4 SO-DIMMs. Of course, these are really straightforward to replace. Along with those, there’s a replacable Wi-Fi/Bluetooth card, and M.2 SSD. Unfortunately, the stock SSD is only SATA, and only 128GB. The mechanical storage is a 1TB 2.5\” hard drive, and a DVD-RW drive. The likelihood of this being used, however, is quite small.

The only upgrade I’ve done so far, is to swap out the DVD drive for a second 1TB hard drive. This gives me a total of 2TB of spinning storage. In the near future, I intend to upgrade the SSD to a 1TB NVMe model. It’s not a hugely expensive, but a worthhile upgrade. Because I’ve added the second hard drive there’s no rush to upgrade to a 2TB hard drive. The downside to having 2 1TB drives however, is that it has a significant impact on battery life. I’ve got my MacBook Pro for portable use, so I don’t feel I’m missing out, not being able to use it on battery for long.

As well as upgrading the SSD, the plan is also to increas the memory to 32GB at some point too. As there’s only two slots, and they’re both populated at the moment, I’ll have to replace both sticks, so I can at least recuperate some of the cost by reselling the existing modules.

What is it like to use?

I’ll be the first to say I’m not a huge fan of Windows 10, hence why I attempted to switch to Linux a couple of months ago on the old Ryzen desktop. I much prefer MacOS for most tasks. However, for gaming there’s just no competition at all – Windows is just better. Because of that slight bias, we’ll ignore Windows as a factor. Although, as an experience of using Windows, it’s been a pleasant one. With that, maybe there was some stability issues with the old Ryzen platform.

If we look at just the hardware of the system; overall it’s a pretty good experience. Going from the 2880×1800 15 inch display on my macbook to this 1920×1080 display is a noticable difference, but the colour accuracy and contrast is still very good, so it’s not an issue. Typing on the Steelseries keyboard is a solid experience too. Of course there’s no comparison between it, and a mechanical keyboard, but I didn’t expect that.

There is one part of the whole experience which has been a huge dissappointment. That’s the trackpad. Once you’ve used one of Apple’s force touch trackpads, you find that just nothing on any Windows machine comes close. However, when you compare it to trackpads on high end Windows laptops, like the Surface laptop, or the Dell XPS series, it’s still awful. There’s a brushed plastic texture on the top  which isn’t very pleasant to use when moving left or right. The click of the buttons really isn’t very nice either. It’s basically just a huge disappointment.

So overall… has it been worthwhile?

In essence, yes. The trackpad issue has been easily resolved by using my Logitech MX Master when working, and my Cosair Scimitar when gaming. The change in storage is brilliant! I use an external 5TB USB-C drive for my mass storage for this, and my MacBook Pro, so any data I don’t need all the time is on that. Having two drives has made it very easy to seperate different activities. The stock drive is being used to store my games, and my user profile folders. Whilst the drive I added is being used to house all my music related apps and plugins, as well as anything I need for my work.

As I said before, the drop in graphics performance shouldn’t be hugely noticable in day to day use. That’s exactly the case. I haven’t missed the GTX 1080 at all, althugh I’m still yet to try using it for any VR gaming.

Apart from the trackpad issue I mentioned earlier, so far I haven’t had any bad experiences at all switching to this laptop instead of the desktop. I don’t regret it one bit. I’m quite pleased about that, as I didn’t want to have to sell this laptop to get another desktop.

Switching From Windows To Linux… Didn’t Work

It was great… until I wanted to do 2 things

You may remember, a couple of weeks ago, I published a post discussing my plans of switching from Windows to Linux. This being on my primary “PC” desktop using the Manjaro distribution. The time I’ve spent with Manjaro has been great. Everything that I’d use on a daily basis has just worked. One thing that I expect is putting people off switching from Windows to Linux, is gaming. However, using Steam Play and Lutris I’ve had no issues whatsoever running any games. However, I say “has”, because I’ve since nuked the install from my 960 Evo and switched back to Windows 10. I’m really quite disappointed in my decision as I was very impressed with almost everything about the switch.

Alternative Apps

Finding alternative apps proved either to be surprisingly simple, or just plain not needed at all. One of the apps I wasn’t looking forward to finding an alternative to was Adobe’s Premiere Pro. This actually proved to be the easiest alternative to find as, Blackmagic Design’s Da Vinci Resolve is available on Linux. It’s not a Non-Linear Editor (NLE) app that I’ve had as much experience in, as with Premiere or Final Cut. It is still one that I have used before, and I feel is a very competent NLE. Most other apps that I wanted were also straightforward to find. The IDEs that I use are all available on Linux, apart from Xcode of course. That’s not available on Windows either, so it’s not really important to this project.

The Initial Issue – VR

So, what was my problem then, if everything I wanted was available on Linux? Two things. The first, and most straightforward to explain is VR. Linux has literally zero official support. There is an unofficial library called OpenHMD that enables Linux support for the Oculus Rift. This would be great… if I could get it to work, which sadly I couldn’t. There will definitely be another attempt to get this working at some point in the future as realistically, VR is a small proportion of what I use my desktop for, so it’s a small reason to not use Linux.

Couldn’t I just use a Windows virtual machine with a GPU and the usb devices passed through to it? Yes, I could, but not with my setup. Because I’m running an AMD Ryzen CPU, I don’t have any integrated graphics, so I’d need a second dedicated GPU to do so. For the USB passthrough, I’d need a dedicated USB 3.0 controller card. One that doesn’t share all its ports from one controller chip. As otherwise there wouldn’t be enough bandwidth for all the Oculus sensors and headset. 

My SSD situation would also be detrimental to my experience, as I only have one, 250GB SSD in the system. That’s not enough space to split between Linux and a Windows VM. I’d have to get another dedicated NVMe SSD, just for the Windows virtual machine. That’s three fairly expensive things I’d have to buy, just to be able to switch over to Linux. Hopefully in the not too distant future, VR will gain official support in Linux. Either that or I’ll be able to get OpenHMD working properly so that issue is no longer an issue.

Weird Apps I Need For Projects

The second reason to switch back was related to a game console project I’ve been working on. I’ve gotten ahold of another original Xbox which I’ve been attempting to upgrade its hard drive from its stock 10gb drive to a new 1TB SATA drive. Trying to get the drive loaded up with the Xbox’s software and locked with the key (all of this is explained on the project’s page) proved to be a hugely difficult feat on Linux. 

I ended up putting the new drive in my toaster and passing it through to a Windows 10 virtual machine. The software that I used to lock the drive wasn’t happy with the toaster being passed to a virtual machine. So it didn’t recognise it as a drive, and couldn’t do anything with it. I also encountered some issues with running the software on a native Windows 10 install. These are discussed in the article for the project. There’s similar situations that I run into regularly, which are just made more difficult because I’m running Linux. However, those can be avoided by running windows straight up as a dual boot from another SSD.

Dual booting would however, defeat the point of this whole thing. I wanted to be able to be entirely relying on Linux, and ideally not need to use Windows at all. Once Wine has improved device support, for things like USB devices, and optical drives, it will be very capable of running apps like the Xbox HDD maker. Until more apps get native Linux versions, and Wine becomes more capable of running apps like the Xbox HDD Maker.

Conclusion

I definitely want to try switching from windows to linux again, in the future. Ideally, once Wine has improved its device support, and once Oculus add Linux support. If you’re not trying to do anything like I am, then I see no issues in your future for your own switch.

With Apple’s upcoming macOS Catalina I can see a lot of people taking the plunge and switching from macOS to Linux, or at least just running it as a dual boot or in a virtual machine. This is due to Apple’s dropping support of 32-bit applications, like Wine.

My Attempt At Switching To Linux On The Desktop

Windows Had Been Getting Me Down So I Decided To Try and Change

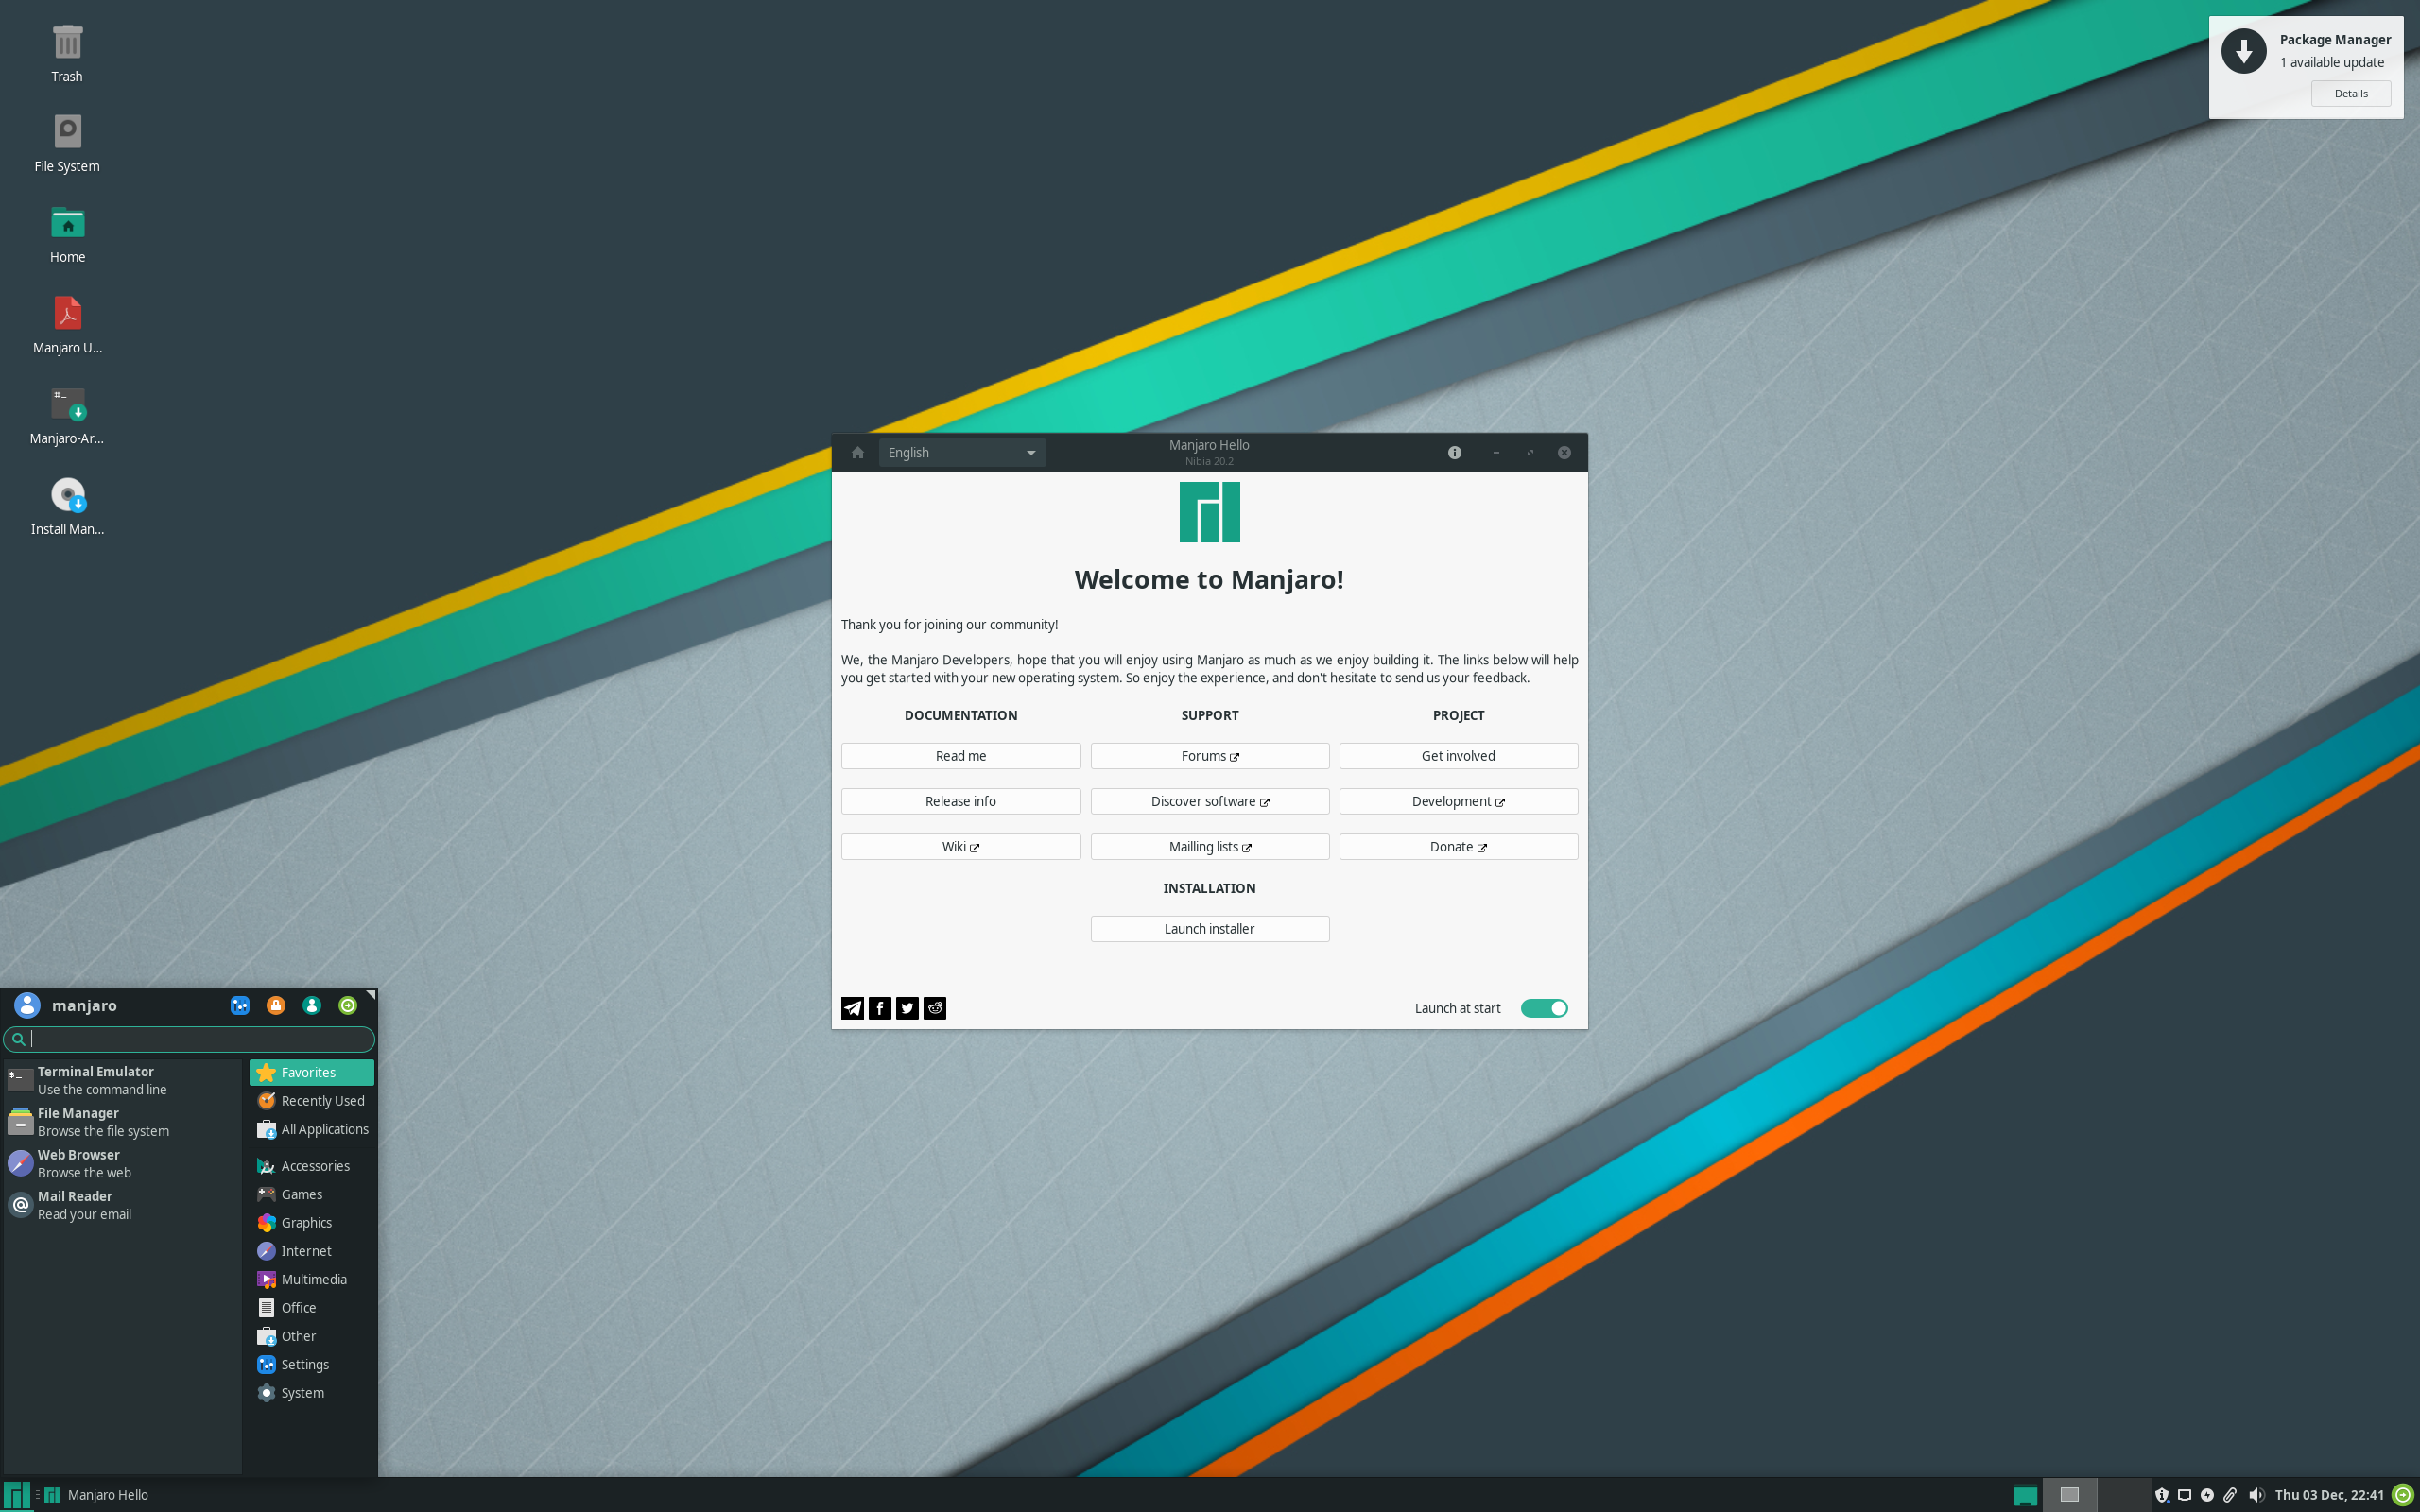
No, I’m not going to be talking about the next version of Windows. Which Microsoft has already stated they don’t have any intention of releasing. I’m talking about starting my journey in moving away from Windows, and switching to linux

The Machine I’m Using

I’m starting with my desktop at home which runs an AMD Ryzen 1800X, an NVidia GTX 1080 and a Samsung 960 Evo NVMe SSD. Of course there’s more hardware than that, but those are the components which could cause issues relating to drivers.

Aside from this desktop, I’ve got three other machines I use regularly, two are Macs, which run only MacOS. The other is my hackintosh which again, just runs MacOS. I don’t have any plans to ditch MacOS anytime soon so these machines will remain as is. I’ve also got my servers, all of which run VMware ESXi at the moment. An exception to this is my file server which just runs Windows Server 2016. I’m planning to transition the virtual machine hosts over to Proxmox, and my file server over to FreeNAS.

Distro Decisions

As I’ve been setting up new virtual machines, I’ve been using Ubuntu Server instead of a GUI. Ubuntu based distributions are where most of my prior Linux experience lies. I ran the GNOME flavour of Ubuntu on my old laptop, for about 2 years. For servers, I thought it would be wise to choose a distribution that I’ve used before. Since my desktop isn’t my main machine for anything, apart from gaming, which I don’t have much time for at the moment, I decided to be more adventurous with my distribution choice. Of course, switching to Linux for a daily use machine is a challenge in itself. However, since I think I could manage Ubuntu or another Debian based system fairly easily, I want to add an extra layer of difficulty to the experience. I’m going to use a different distribution entirely, one that’s a bit more complex. 

I’ve considered Arch, and I think it sounds great as it’s infinitely customisable and incredibly secure. But, for now I want to avoid any distros that require manual installation. This rules out Slackware, Arch, and Gentoo, at least these are the common ones. If I look into what I actually want to use my PC for, there are seemingly two main choices. These are Pop!_OS from System 76, and Manjaro. These both look very promising for gaming, as they have very good graphics driver support, and provide almost all the packages needed out of the box.

Pop_OS! Is ruled out straight away as it’s Ubuntu based. Manjaro is based on Arch, but fortunately the installation is streamlined, and uses a GUI. Aside from the installation, almost everything else is just like Arch. When looking for information online, the Arch wiki provides almost all the needed information.

Installation

So, armed with a USB stick filled with Manjaro goodness (of the KDE variety) I set off on the journey of a lifetime. It felt oddly satisfying to nuke Windows from my SSD. Installation was super quick and straightforward – I wasn’t even using a fast USB stick. The most complicated part was choosing which graphics driver I wanted. There’s two options – free and non-free. Free is the open source version, but it’s a little bit outdated. Since the plan is to use the machine for gaming, an up to date driver is preferable. So I chose the non-free option.

Upon reboot after installation, everything just worked – sound, Ethernet, display etc, it all just worked. First impressions are very impressive. I wasn’t sure how good NVMe support would be, or how well display drivers would work. There isn’t any obvious issues that are noticeable straight away. Hell, even my Native Instruments Komplete Audio 6 audio interface just worked. Unfortunately, it’s output channels aren’t quite mapped correctly, so it thinks I only have surround sound options available to me, even though I’m running 2.0 studio monitors it thinks I have a subwoofer too. Hopefully I can change some config file somewhere to fix that. I fully expect that I will be able to, because I’m running Linux now.

The biggest worry I have for my peripherals, is the Oculus Rift, as there doesn’t appear to be any Linux support for it at all. On first impressions, that’s the only reason I think I might have to dual boot with Windows. I’m quite excited for Linux’s file system support as I’ll be able to read and write to HFS+ drives without the use of an extra application like Paragon HFS+ for windows.

Software

Software wise, I think finding alternatives for most apps won’t be an issue, if there isn’t even a Linux version already available, which I know there is for a lot of apps I use. The Adobe Creative Suite is going to be the biggest difficulty. I’ve used GIMP and Inkscape before, and they just don’t compare to Photoshop and Illustrator, so sadly I have low expectations for any other alternatives to apps such as Premiere Pro, and After Effects. But, I shall remain hopeful. If there aren’t any adequate replacements then I’ll stick to CC 2018 on my Mac Pro 1,1 for my Adobe needs at my desk, and the latest versions on my laptop or my Hackintosh when I’m out and about, or at the office.

There shall be an update shortly, hopefully within a week or so, by which point I’ll hopefully have gotten into the swing of using Linux on a daily use machine, and I’ll have a better idea of how well the software alternatives will suit my needs. I already expect that Linux itself, will more than suffice for most of my needs.

Dell U2410f – Why A 9 Year Old Display Is Awesome

I sold a modern TN display in favour of an old IPS display.

I needed to get another monitor for my home office, as I sent my BenQ GW2765 to the new office. The monitor of choice was a 9 year old Dell U2410f.

Why Did I Need Another Display?

While I was living in my flat for my 3rd year at University, I upgraded my secondary display from a BenQ GL2450 to a BenQ GW2765. I couldn’t fit a third display on my desk at the time, so i sold it off to my flat mate for a pretty reasonable £75. It was an awesome, and somewhat much needed upgrade, going from a 1080p TN panel to a 1440p IPS panel. It’s a great display, but not really an exciting one. It’s just got the four inputs you’d expect – VGA, DVI, DisplayPort and HDMI, and it’s got a pretty good stand. It doesn’t even have a USB hub. So we won’t talk about it really, as there’s plenty of reviews online you can read if you want.

When we got our studios at Ushaw college, I decided the new BenQ should go with me there. Since I wanted to have three displays, I hunted on eBay to find two fairly low cost 1080p screens. I managed to grab 2 dell p2412s for under £80. Their colour accuracy isn’t great, but it doesn’t matter as they’re just secondary monitors. So, at home I was down to only my Samsung 144Hz display, which wasn’t ideal for my home office. I’d ideally like at least 2 displays. So i went off to eBay yet again to see if I could find another p2412. Sadly not, as the other two I ordered were from a recycler. They had a lot available when I ordered mine, but given their price it’s obvious why they sold so quickly.

The Model I Chose

There was a plethora of alternative displays available, but a lot of them had low quality TN panels in them. The first decent quality display I came across was another dell, this time a Dell U2410f. At 9 years old. It’s not even LED backlit. It still uses a CFL bulb. Seems like a bit of a silly decision really, so I bought it. At £75, I essentially paid nothing for it as that’s how much I sold my old BenQ for.

One useful feature of my BenQs was that their VGA inputs could accept a component video input through them too. This made it very simple to connect virtually any games console to them. I’ve been using a composite to HDMI converter for those without native component or HDMI. The native component input on them is surprisingly good. It’s scaled much better than the cheap composite to HDMI converter that I was using too. I quite missed this feature, and the ‘new’ Dell, filled that gap, as it’s got a huge range of inputs. 

The Main Reason I Bought It

It’s got DisplayPort, HDMI, VGA, dual DVI, and the most useful ones for me, composite and component. Of course I’ve got the monitor plugged into my PowerMac G4 hackintosh and my gaming PC too, both via DVI. Although one is using a HDMI to DVI adapter. I’m keeping the DisplayPort free for plugging in my laptop, and the HDMI free for plugging in more modern consoles. The VGA will be used for plugging in the PowerMac G4 when I get to ordering a longer VGA cable. There’s a built in USB hub and SD card reader too. As it’s a professional monitor, I’m assuming it was popular feature with photographers when it was new.

What Is It Like To Use?

As it is an older monitor, the Dell U2410f uses CFL backlight instead of an LED one. It’s still fairly bright so I’m assuming it hasn’t actually been used that much. Either that or it was unusably bright when it was new. The big downside with CFL, to me at least, is that the monitor is quite bulky and very heavy. This is a bit of an issue given that I’ve got it mounted to an arm. I’ve had to tighten all the adjustment screws as much as possible. It can still tilt and rotate a little bit, but it’s mostly pretty stuck there.

In terms of actually using the display, the colours are pretty good given its age and backlight technology. It’s not quite as good as the VA panel that’s on my Samsung despite it being an IPS. For a secondary display, I’m not doing anything which relies on colour accuracy, it’s pretty good, and more than usable. For the analog inputs, the scaler seems to do a good job, noticeably better than the BenQ that it replaced. It had a picture that wasn’t nearly as sharp. The composite input, as expected, provided a much cleaner picture than that of the cheap converter I’d been using previously. 

Another brilliant feature is picture in picture. I’ve already used this a bunch of times when using FTP with my original xbox. I can keep the xbox visible in the bottom corner, and still use FileZilla on the same display. Aside from having another input just displayed in a small box, you can also show two inputs side by side. However, I can’t see anytime when this could be particularly useful. 

Conclusion

There are other older models of Dell monitors that have the composite and component analog inputs so if you’d like that, then the Dell U2410f isn’t your only option. But if you do want a monitor it’s those inputs these older Dells are definitely a good way to go if you can get one with a backlight that’s still doing pretty good, and you don’t mind them being warm and heavy.